Folly Beach is a favorite source of inspiration for me. It is a barrier island and known as "The Edge of America," which inspired the name "On the Edge Studio." I enjoy working with 3 different themes- Traditional, Nature, and Mixed Media. This blog is a way to show my quilts and share some of their stories with family and friends.


Wednesday, May 28, 2014

Denny Screens - Inexpensive Silk Screen Frames

Fiber Junkies had a wonderful day at Denny's house. We started by learning to make silk screens from inexpensive window screens purchased at a hardware store or Walmart.
 We arrived to find Denny had all our supplies laid out and organized for us.
 This is a nifty tool we used to push the spline into the slot on the back of the screen.
 The best screens to use are made with aluminum frames. They come as pairs with this plastic part on each corner holding the pair together. First thing we did was to remove these corner pieces, which was easy to do.
 Then, we wanted to remove the plastic screening. So Denny showed us to go to the corner where the black rubber spline had cut edges.
  We pried up the corner and the rest of it came off easily.
 After removing the screen, we placed a piece of inexpensive sheer fabric over the screen back. The we put the black rubber strip back in the spline slot. The first 2 sides went pretty well. It was a bit trickier for the last 2 sides as we wanted to keep the sheer fabric taut. It helped to have a friend help.
 This is what it looked like. Then we trimmed off the excess sheer fabric, leaving some to be taped into place.
 We started by putting fun colored duct tape along the back 4 sides, covering the entire spline and sheer edges. Then we turned it over to tape the front edges. This is mostly to keep the paint or water or whatever from getting trapped in the spaces.
 Judy brought this pretty floral duct tape for her screen.
 Val and Gen both brought this fun tape.
This screen made by Denny a few months before shows the extra strip of duct tape on the front to create a "well" to pour the paint, dye, or medium into before spreading across the screen. It also shows a circular design that Denny made for a project. It is made from the Iron on Vinyl, using the same method we had done a few months ago. So, she made the screen and then ironed the vinyl to the bottom side to create a permanent, inexpensive. silkscreen.

Thursday, May 15, 2014

I Spy Quilts

I love the I Spy style quilts for children. These are the kind where there are a lot of different fabrics, each of which feature people, animals or objects such as food, toys or cartoon characters. I had been collecting fabrics for many years.
 I especially like collecting food fabrics. Fruits, vegetables, beverages, and fast food, like pizza and hamburgers are such fun.
 I like fish, wildlife, bugs, and butterflies.
 Clothing, toys and clowns care also fun.
 In 2009 my PTA group had its 1st Retreat. Mary, Judy and I all decided to work on the same project- a variation of an I Spy quilt. We combed through our stashes and cut 4 1/2" squares of conversation prints and cut 2 1/2" strips of fun fabrics. The bin above has what was leftover.
Here we are with the quilt tops we made at retreat. The 3 of us shared the fabrics we brought. So there is a lot of similarity in our quilts.
 I had made 2 tops. This is one of them after it was quilted.
 This is the 2nd one. It looks quite different just from using a different border.
 My niece had a baby last week. I wanted to choose gender related fabrics. Judy is the keeper of our "stash" and I chose the more male popular items for the baby boy. For this quilt, I wanted to change the design of the quilt. So I decided to frame each square with a narrow border. I like how each block is separated. This is the finished quilt.
My mother is always interested in maps and I thought I would put this fabric on the back of the quilt. Maybe this boy will take after his great grandmother and enjoy maps.

Wednesday, May 14, 2014

PTA in May

My wonderful Asheville group had our monthly gathering last week. Show and Tell is a favorite part. I thought I would share some items.
 Linda made this improvisational "modern Quilt". I especially like the black lines that she stitched.
 Judy showed this wonderful piece. She has a really nice method of applying the floral motifs, which is featured on her blog "Windy Hill Happenings". The feather quilting is especially nice.
 Gen made this really appealing mixed media piece. The small flowers in the center of each block are made from paper.
 Connie was featured in the Asheville Newspaper a few weeks ago. The students at the school where she works part time made this laminated poster for her.
 Here is Connie in a fun apron made from a vintage tablecloth given to her. In her hand is a small box with bees. Connie is an active bee keeper.
This is a close up of the bee box. There are 2 bees and a potential queen inside. When the queen is ready, she will be introduced to a hive.
 Janice has been making pieces from photographs printed on fabric. I really like the combination of the trees in winter with the tree fully leafed out.
 This is a really nice idea she has for labeling her pieces.
 Unfortunately, this piece is rotated 90 degrees. The tree with all the white blossoms gives a wonderful 3D puffy feel to the piece.
 Dort made a baby quilt and I really likes the animal motifs she quilted along the borders. This one is an elongated cat.
 This teddy bear was on another border edge.

Monday, May 5, 2014

Dyeing Retreat- Fun with Friends

Though we had a marvelous time dyeing a variety of fabrics, the best part of the retreat is always the fun we have together.
 We had a picnic table set up for applying dye.
 We had the dye mixing and microwave dyeing set up inside.
Something special was microwaved in this bin.
Who has time to stop for lunch?
 Somebody's dyed socks released some dye on her feet 10 years and many washings later.
 Oops, I think I was too focused on getting the camera lined up for this selfie. I was actually smiling big time.
 A little time on the dock for Happy Hour.
The sunsets were lovely.

Thursday, May 1, 2014

Dyeing Retreat- Microwave Stripes, Tray Dyeing and Ice Dyeing

We used a variety of fabrics and a variety of methods in our 2014 Dyeing Retreat.
 In this technique, soda ash soaked fabric was pleated in accordion style and placed around the perimeter of a microwave safe container.
 A small amount of dye was poured in the bottom and pressed to the edges to encourage the dye to travel up the sides.
 After about 10 minutes, it looked like this.
We each did several pieces with this method. Here they are after washing out the excess dye.
 Something new we tried this year was tray dyeing. This is the early stage of my piece in a cutlery tray. The fabric is soaked in ash solution, accordion pleated and laid in the tray with the folds up the sides.
 We had also constructed 2 large trays from 1" x 6" boards screwed together to form a U shape and lined with plastic. This is Mary's. She has 2 of the 3 colors applied so far.
 This is Judy's tray. Look at the fabulous migration of the color up the side to the folds.
 I did a 2nd piece, in one of the large trays.
Someone had brought cotton batting to dye. We thought we would soak up the excess dye from our trays to dye the batting. Unfortunately, the dye didn't really take. We don't know why. It looked pretty potent, like the photo above before we washed it out.
 This is my 1st one from the cutlery tray.
This is my 2nd one, done on cotton sateen.
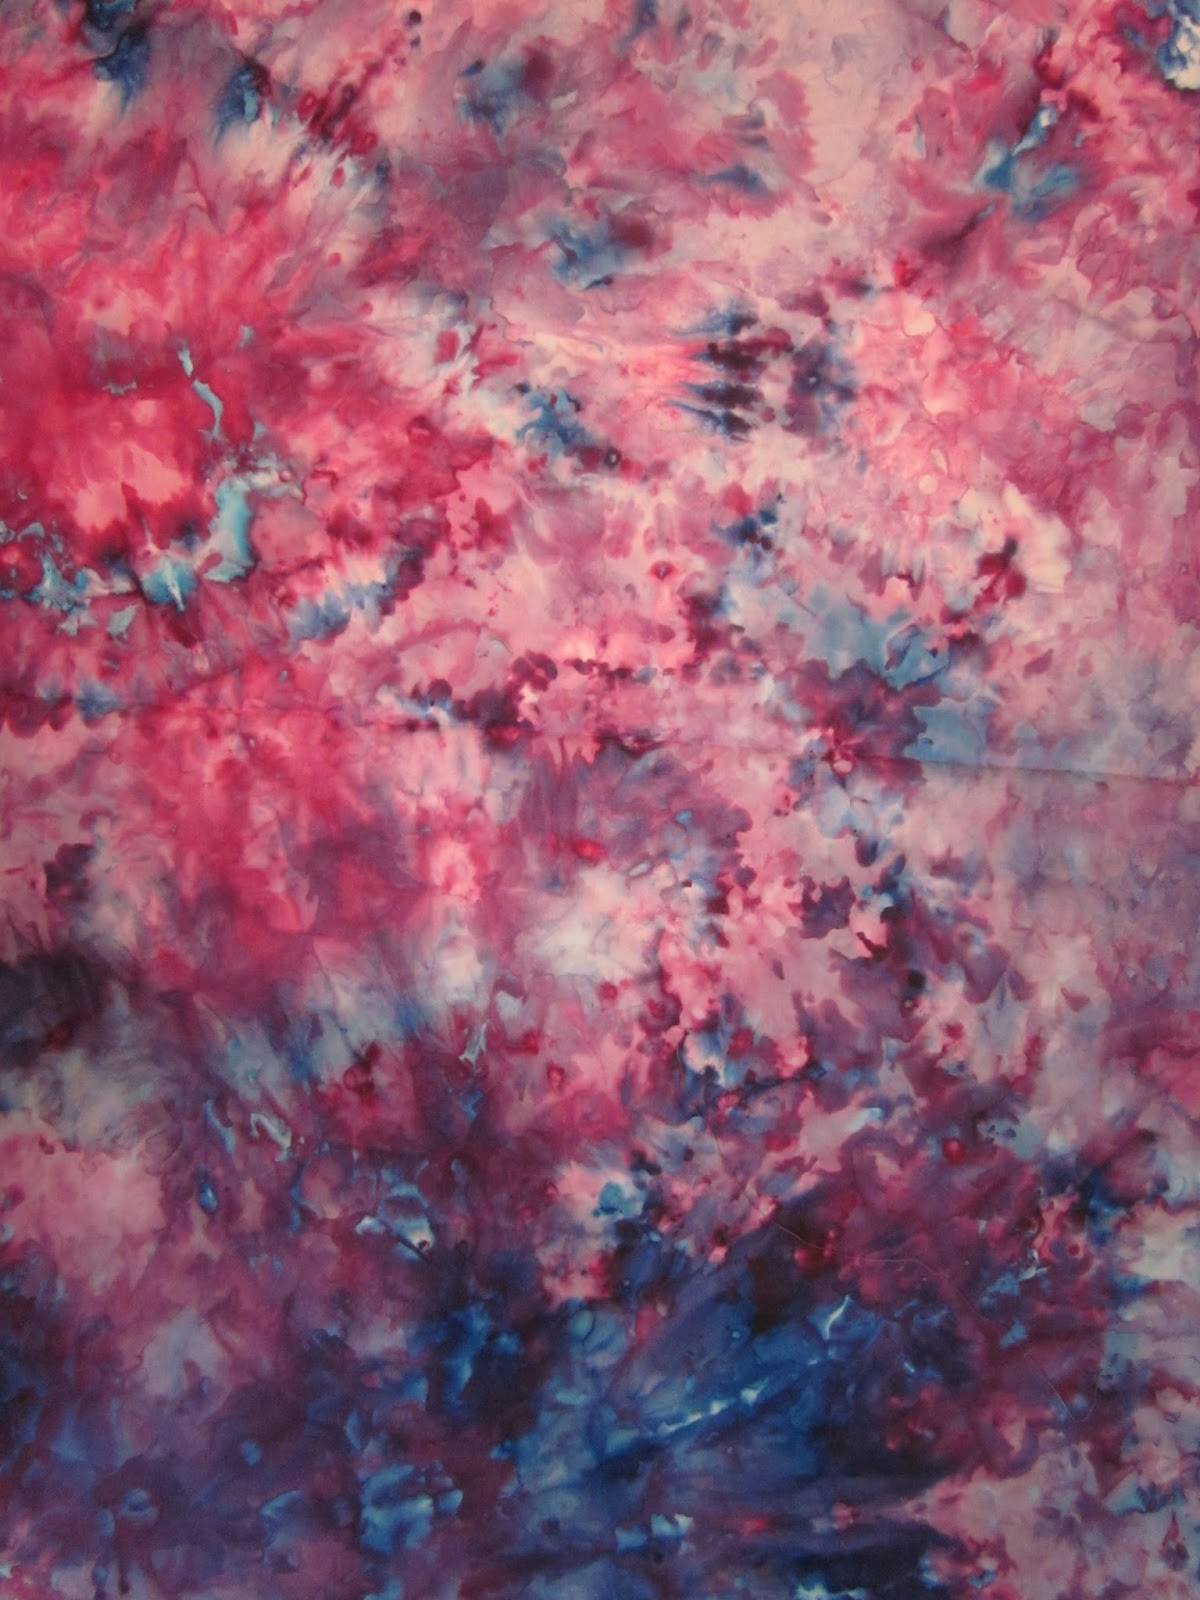
 We all agreed that our favorite technique is ice dyeing. Mary Kay sent me some of her very old dye powders to use for this technique. These are the 4 colors we selected to use for the 1st batch.
 Here they are on the wire rack. We each had a piece on the top of the rack and one underneath in the plastic bin which catches the runoff color.
 All 3 of our pieces turned out very similarly. Don't think the old dye had lost any of its strength. The colors are very vibrant.
This is my fabric from the tray under the ice dye, which is often a smoother, really lovely application of the colors.
Time to start a second batch. Again, all 3 of us shared the colors and the rack and tray space.
I just love the colors in this batch.