Folly Beach is a favorite source of inspiration for me. It is a barrier island and known as "The Edge of America," which inspired the name "On the Edge Studio." I enjoy working with 3 different themes- Traditional, Nature, and Mixed Media. This blog is a way to show my quilts and share some of their stories with family and friends.


Saturday, December 14, 2013

Dyeing a Four Color Gradation

I still have lots of dye left and don't want to waste it. So I mixed up 4 colors that are sequenced by adding more red. This is a method to dye several colors all on one piece of fabric.
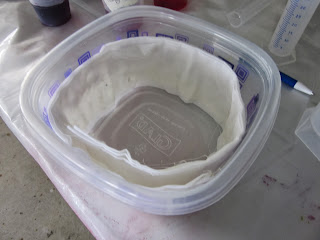
 I started with a fat 1/2 yard that was soaked in soda ash solution. I arranged part of it in the dish and added the 1st color. I really manipulated the material to get an even distribution of the dye.
 I pushed that colored part of fabric up the other side of the dish and arranged more of the white fabric in the dish. Then a 2nd color was added and manipulated. Then a 3rd color was added.
This photo was turned upside down, but it shows that I added the rest of the fabric to the dish with the 4th color in the sequence.
This is the final fabric. I love the color gradation.
 

Tuesday, December 10, 2013

Shibori Style Dyeing in the Microwave

It was time to use the rest of the dyes I had mixed a week before. So I thought I would have some fun pleating my fabric and dyeing with 2 colors.
 I started by pressing my pfd fabric. I did 2 pieces, one was pressed with the accordion pleats going with the grain, the other was pressed with the accordion pleats across the grain of the fabric.
 I soaked the pleated fabric in soda ash solution, squeezed out the excess, and then placed it in this microwave safe plastic container.
 I added a pretty peach color I had mixed to the bottom of the container. The fabric soaked it up.
 This is the 2nd piece to which I added a darker reddish color.
 This is a side view of the fabrics in the dishes. I let them sit for about 15 minutes.
 Then I carefully turned each one so that the undyed side was on the bottom of the dish and added a 2nd color.
You can see how the color traveled from the side view.
 I covered the dishes and nuked them in the microwave (an ancient one that is no longer used for food) for about a minute each.
These are my results.

Monday, December 2, 2013

Silk Scarf Dyeing with Procion MX Dyes

What a wonderful Thanksgiving with our family. My daughters were home and I thought a scarf dyeing project would be fun to introduce them to fabric dyeing. It was my first time mixing my own colors from the 3 primary colors at home. I ordered several silk scarves from Dharma.
 I had this box that I measured the dyes in. It helped to contain the dye powders so they didn't fly around my laundry room.
 For each scarf, my daughters chose 3 colors in the Sunshine color family of Carol Soderlund.
Time to mix the colors
 They soaked each scarf in warm water and arranged it on a tray. See the plastic cups with the mixed dye colors?
Each of the 3 colors was poured onto the scarf.
 We are mushing the scarf about to get the color everywhere.
This is what it looked like after we manipulated the scarf to move the dye.
This is Maggie's scarf. She is adding the fixative.
 We covered the scarves with plastic wrap to keep the air out and covered them with a towel to keep them warm.
We decided that was fun and so we did some more. I didn't have any more trays so we used these plastic bins that washed lettuce comes in to arrange the scarves and apply the dye.
 After the batching, I washed them in synthrapol in Hot water and hung them to dry.


We did 5 scarves in all.
Melanie is modeling hers.

Tuesday, November 26, 2013

Beading with Fiber Junkies

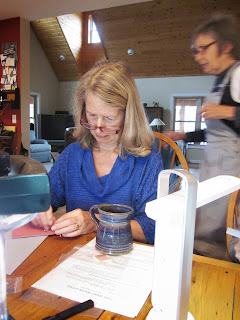
My Fiber Junkies group met recently at Mary's house for a wonderful lesson in beading using the peyote stitch around small mirrors. The same method could be used to bead cabochons or other small, flat objects.
 Mary is showing us the back of one of her beaded works of art.
 This is the kit she put together for each of us.
 This is an example of Mary's work with this stitch and a cabochon.
 I really love this one.  More examples of Mary's work can be seen on her blog and gallery shop. there is a link under My Blog List on the margin of this page.
 Judy is concentrating on her piece. Good light really helps.
 Gen is enjoying hers also.
 Val wasn't sure if she liked this at first, but it didn't take long for her to have fun.
 Denny is very focused.
 We had a feast for lunch, all of it homemade by Mary who is also a wonderful cook.
 Judy finished the first mirror by adding some lines of beads over the mirror. On the right is her 2nd one. That first row takes a while, but the other rows are so quick and fun.
 These are the 2 that I beaded. The one on left is just 3 rows of beads around the mirror. It went very quickly. The one on right I added a 4th row on the inside. I like that look. It was also very quick.  Such a fun time with such an excellent instructor.

Sunday, November 10, 2013

Fabric Dyeing with Carol Soderlund

Recently I had the wonderful experience of a 5 day workshop at ProChem in Massachusetts with Carol Soderlund.  The class had beginner to very experienced fabric dyers in it and there was plenty of information for all of us to learn.
 Carol is showing us a book each of us will make with all the fabric samples we will dye in the first 2 days.  There are over 1,000 colors we will dye.
 Here she is with packets of the fabric squares we will be dyeing. The edges were pinked which was really helpful in limiting raveling.
 This is some of the dye we measured. Believe it or not, the 2 rusty orange looking dyes in the dishes near the front equaled the same amount of dye, by weight, as that reddish orange colored dye in the dish at the back of the photograph.
 Anne, a member of my dyeing group, was prepared to stir the dye with her extra long rubber gloves.
We have measured the salt, water and dye to be ready to start.
 Here is a yellow dye bath.
 This is an orange one.
Now all the colors are in the washing machine to remove the excess dye.  
 Aren't they so pretty in the dryer?
 Our homework was to press all those squares of dyed fabric. Here is Carol with more members of my group showing the beautiful results.
 We cut the fabric into strips and sorted them to exchange with fabric dyed by the other groups.
It took quite a while to cut the strips into 1" squares, which we taped into our books.  This was only the first few days of the workshop. Next we learned about color gradation, overdyeing, making complementary colors, microwave dyeing and so much more.